
The FinImpulse API uses Bearer authentication. Each request must include an API token, a unique key that identifies your account.
To get and manage your tokens, use the API Settings page. There, you can:
- View, copy, and regenerate your default token.
- Create additional API tokens and manage them.
- Restrict tokens to specific IP addresses.
- Get the Sandbox token for testing.
The page also contains the Credit Limits section, where you can limit daily API usage, in total or per endpoint (see section 5).
1. Finding and Using the Token
There are three types of tokens: the default token, additional tokens, and the Sandbox token. Each type is described in the sections below.
To find your API tokens:
- Sign in at app.finimpulse.com. To create an account, refer to the Sign-Up Guide↗.
- In the Mode switch at the top of the left sidebar, press API Mode.
- In the left sidebar, press API Settings.
To use a token, add it to the Authorization header of each request in the following format:
Authorization: Bearer YOUR_API_TOKEN
For example, to send a test request to the Sandbox in Postman:
- Copy the Sandbox token from the Sandbox API Token section (see section 4).
- In Postman, create a new request, set the method to POST, and enter the endpoint URL, for example, https://api.finimpulse.com/v1/histories.
- Open the Authorization tab, select Bearer Token in the Auth Type list, and paste the Sandbox token into the Token field.
- Open the Body tab, select raw and JSON, and paste the request body from the endpoint’s request example in the API documentation.
- Press Send.
For request examples in cURL, Python, JavaScript, and other languages, see the Authentication guide↗.
2. Default Token
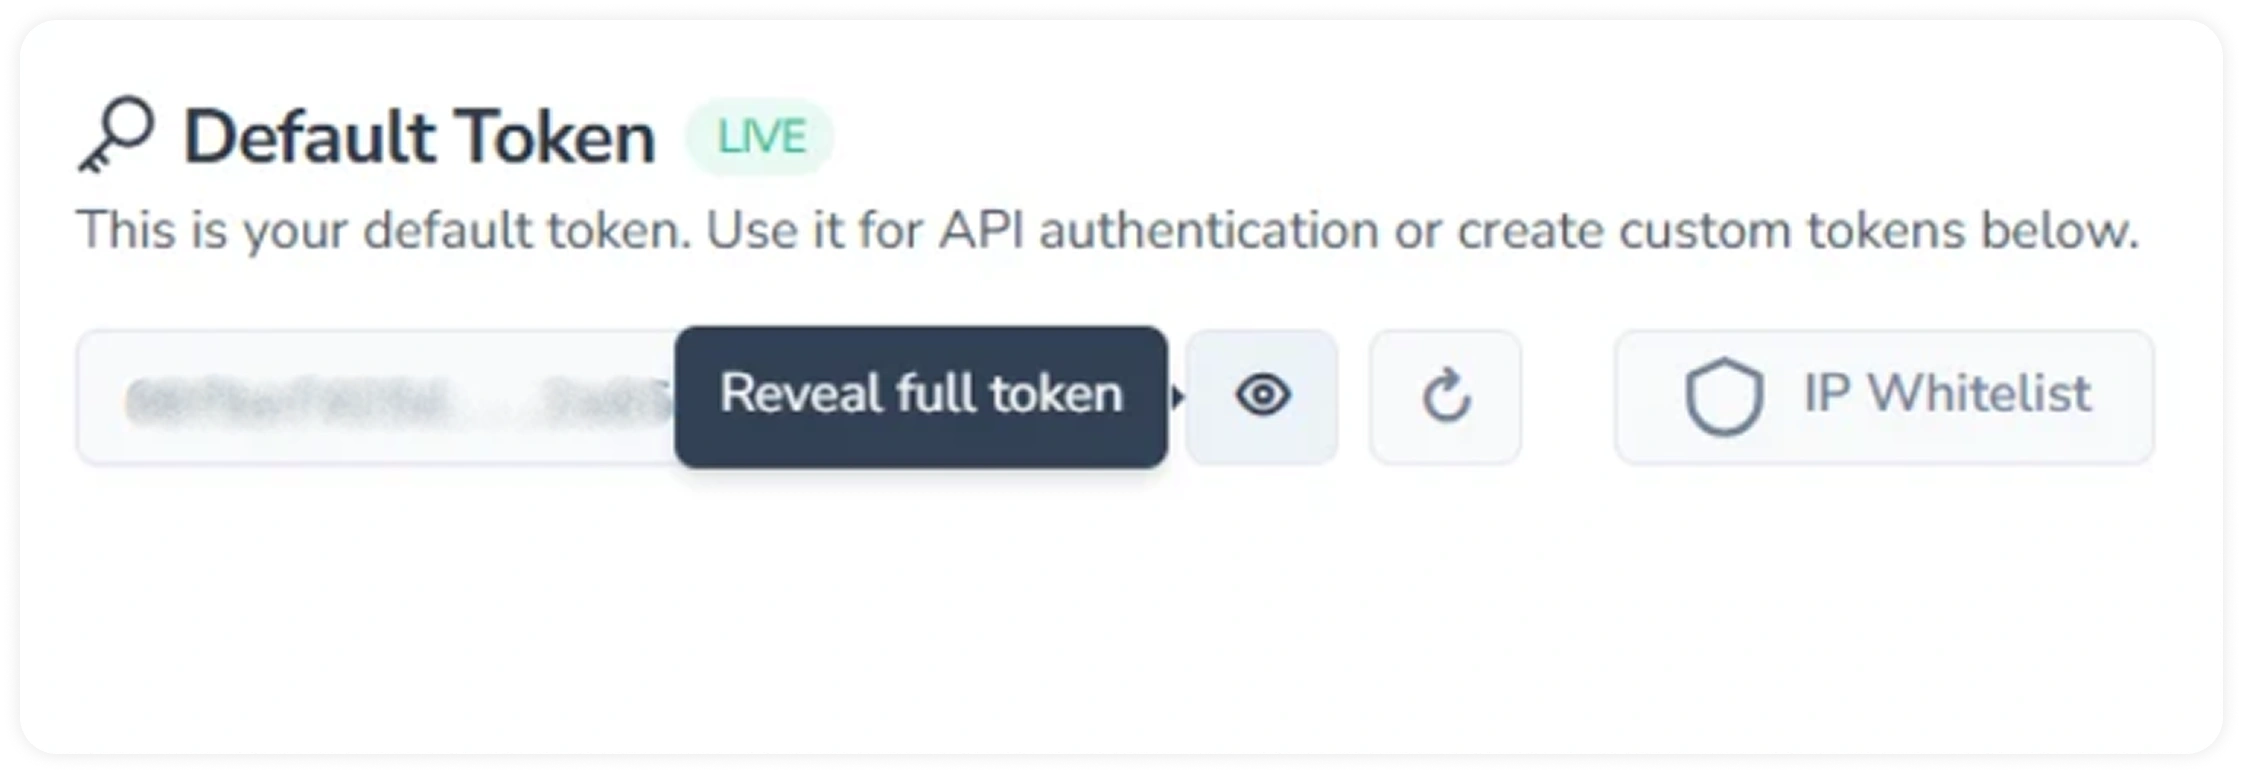
The default token is created automatically with your account. The LIVE label next to it indicates that it works with the production API.
2.1. Getting the Token
To get your default token:
- In the Default Token section, press the eye icon to display the token.
- Copy it.
- Store the token securely and do not share it.
Note that displaying the token again requires password confirmation or a 6-digit verification code.
2.2. Regenerating the Token
If the token has been exposed or shared by mistake, replace it with a new one by pressing the regenerate icon next to the eye icon. After that, update the token in every application that uses it.
2.3. Restricting the Token by IP Address
By default, the token can be used from any IP address. To protect it from unauthorized use, you can restrict it to specific addresses using an IP Whitelist. This way, requests from other IPs are rejected, even if someone else obtains the token.
To set up the whitelist:
- Press the IP Whitelist button next to the token.
- In the window that opens, enter an IP address, or press My IP to insert the address of your current device.
- Press Add.
You can add up to 50 IP addresses to the whitelist and remove them at any time.
3. Additional API Tokens
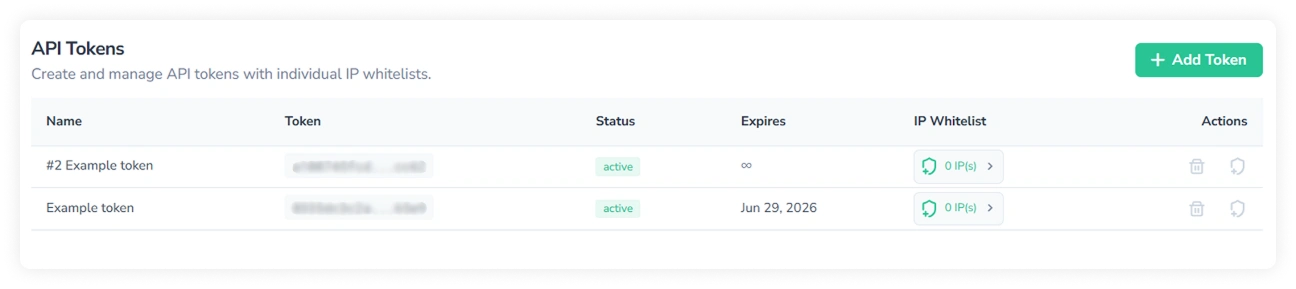
To separate access between applications or servers, you can create an additional token for each of them in the API Tokens section.
3.1. Creating a Token
To create an additional token:
- Press Add Token.
- Enter a token name.
- Optionally, set an expiration date.
- Press Create Token.
- Copy the token and store it securely.
Note: Every additional token is displayed only once, when it is created, and cannot be recovered later. If you lose it, revoke the token and create a new one.
3.2. Managing Tokens
Additional tokens are listed in the API Tokens table. For each token, you can:
- Check its status in the Status column:
- active: The token can be used for requests.
- revoked: The token was deactivated manually and can no longer be used.
- expired: The expiration date has passed, and the token can no longer be used.
- Restrict it by IP address: Press the arrow in the IP Whitelist column or the Manage IPs icon in the Actions column, then add addresses as described in section 2.3.
- Revoke it: Press the trash icon in the Actions column if the token is compromised or no longer needed. Your other tokens are not affected.
Revoked and expired tokens remain in the table.
4. Sandbox Token
To test your integration, use the Sandbox, a testing environment that returns dummy data in the same format as production responses. Sandbox requests are free and are not recorded in your account statistics. Learn how to use the Sandbox↗.
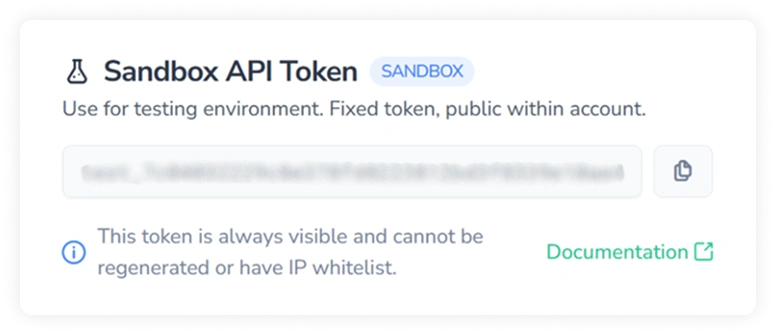
Sending requests to the Sandbox requires a separate Sandbox token. To get the token, press the copy icon next to it in the Sandbox API Token section. The token is always visible, cannot be regenerated, and does not support IP whitelisting.
5. Credit Limits
You can also set daily limits in the Credit Limits section of the API Settings page. Two types of limits are available:
- Global limit: Applies to the whole API.
- Endpoint limits: Apply to individual endpoints.
To set a limit:
- Scroll down to the Credit Limits section.
- Enter a limit value in the Global daily limit field or in the field next to an endpoint.
- Press Save changes.
A value of 0 means no limit. To reset a limit, press the cross icon next to the field, then save the changes.
When a limit is reached, subsequent requests return error 42901 (Daily credit limit exceeded). Limits reset every day at midnight UTC.