
1. Login
To start using FinImpulse, sign up with your email or Google account.
1.1. Steps to Sign Up with Email
- Go to app.finimpulse.com.
- Click Sign Up.
- Enter your name, surname, email address, and password (minimum 8 characters).
- Agree to the Terms of Service and Privacy Policy
- Click Create Account.
- Verify your email.
- The sign-up is completed.
1.2. Steps to Sign Up with a Google Account
- Go to app.finimpulse.com.
- Click Sign Up with Google.
- Complete the steps required by Google.
- The sign-up is completed.
Note: If you register using a Google account, FinImpulse sends a temporary password to your email. Change this password in the Profile Settings.
1.3. Steps to Log In to an Existing Account
- Go to app.finimpulse.com.
- Enter your email and password, or Sign In with Google for faster access.
- Forgot your password? Click ‘Forgot password?’ to reset it via email.
Tip: Your login session stays active for a security-approved time unless you manually sign out.
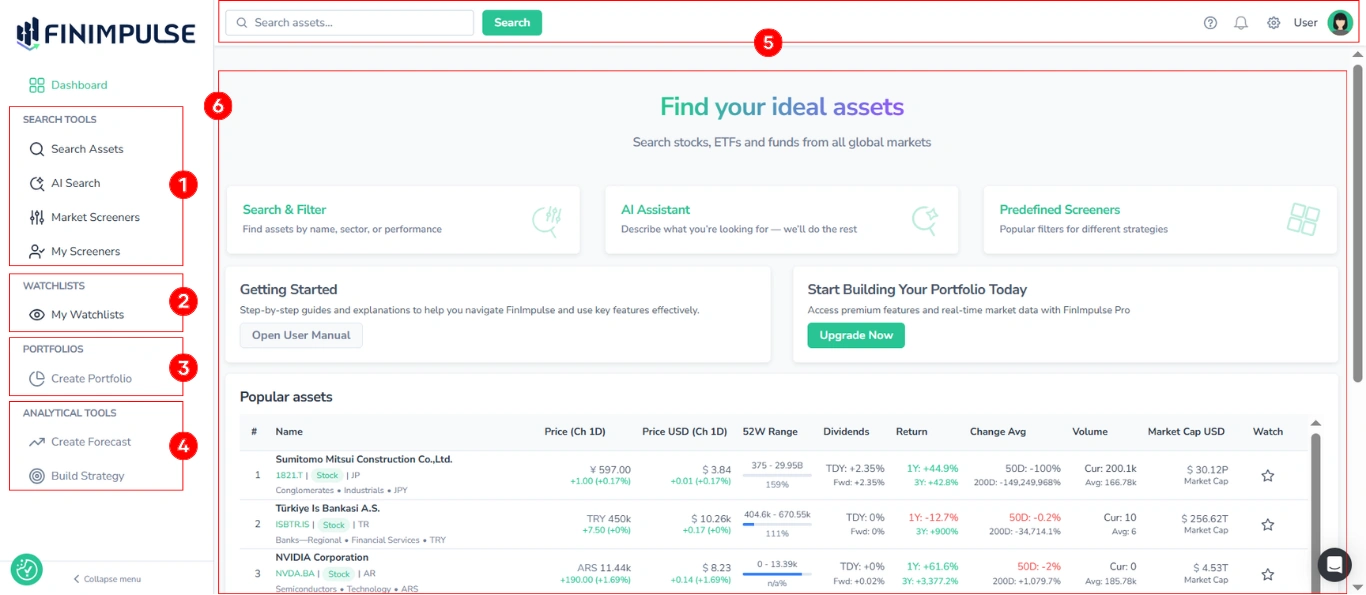
2. Overview
After signing in, you’ll see the main dashboard. It provides quick access to FinImpulse tools and personalized investment data.
Main areas:
- Search Tools: Search Assets, AI Search, Market Screeners, My Screeners
- Watchlists: Save and track selected assets
- Portfolios: Create and manage your investment portfolios (Coming soon)
- Analytical Tools: Forecast builder and strategy builder (Coming soon)
- Top Bar: Global search, support, notifications, and user menu
- Main Feed: Search & Filter, AI Assistant, Predefined Screeners, AI-powered News, Upgrade prompts, and Popular assets table.
3. Navigation
You can access any feature using the left-side menu:
| Section | Description |
|---|---|
| Search Assets | Find stocks, ETFs, and funds by name/ticker. |
| AI Search | Use natural language to describe what you’re looking for — FinImpulse AI finds matching assets (coming soon). |
| Market Screeners | Apply predefined filters to explore assets by strategy or theme. |
| My Screeners | View and manage your saved screeners. |
| My Watchlist | Track your saved tickers and monitor live performance. |
| Create Portfolio / Create Forecast / Build Strategy | Advanced tools for personalized analytics (coming soon). |
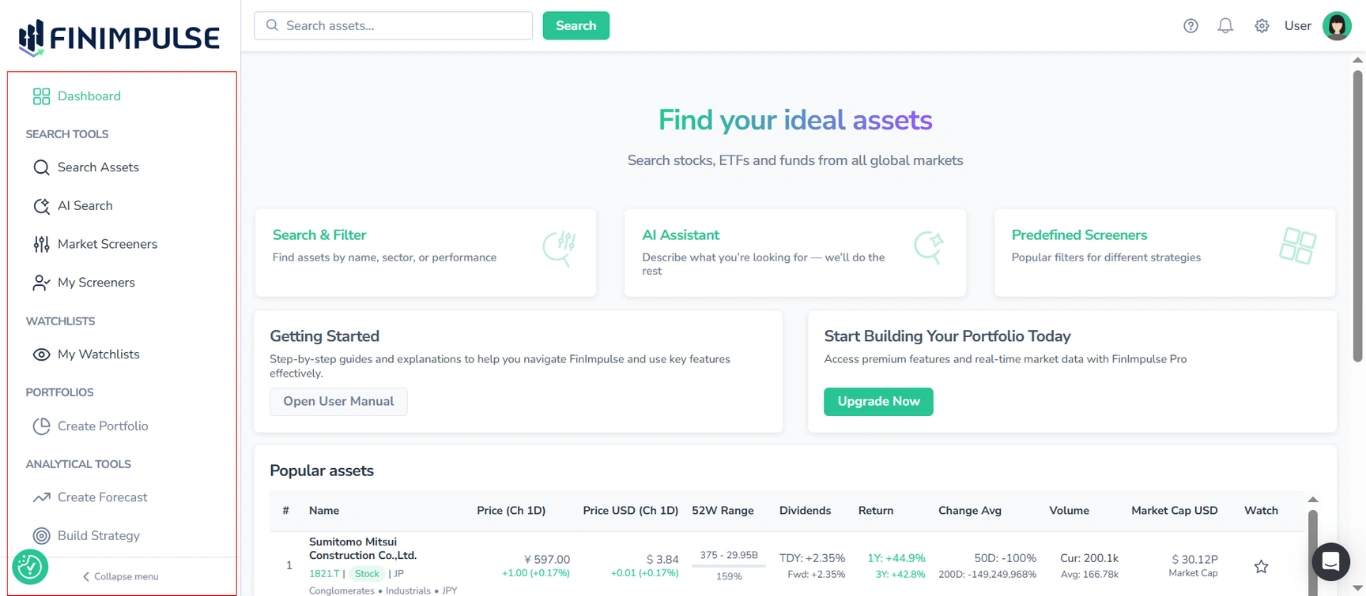
Note: You can collapse the side panel for a cleaner view using the Collapse menu button.
Please review the following manuals:
- Global Asset Search & Filters Guide
- Market Screeners & My Screeners Manual
- How to Work with My Watchlists
4. User Menu
Within the top-right user menu, you can:
- Switch between User Mode and API Mode
- Navigate to the Profile and Billing tabs
- Sign out of your account
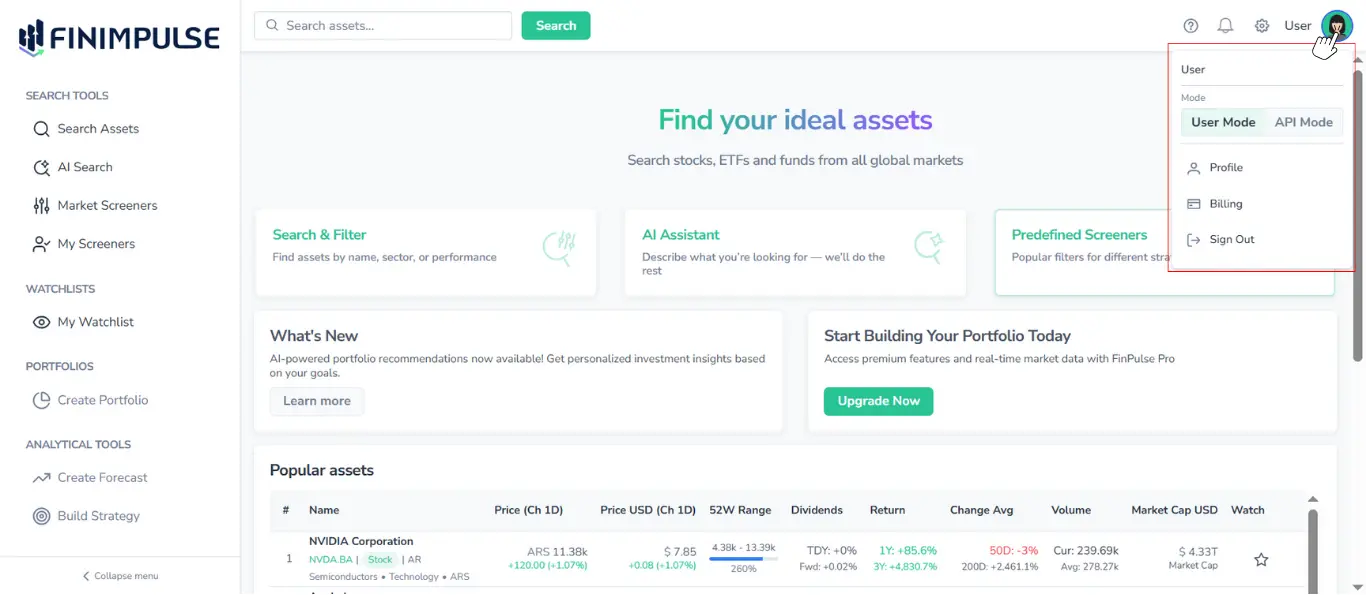
To access your account settings from the top-right user menu:
- Click your profile picture
- Select Profile
The Profile module allows you to manage your account, subscription plan, preferences, and notifications. It also provides access to updates, FAQs, and customer support.
To set and manage your account correctly, please review the following manuals: