
To open a specific watchlist, go to My Watchlist → Click on the row for the watchlist you want to view/edit. You will see:
- The watchlist name
- Total number of assets
- Inline filters (Quote Type, Market, Sectors)
- Data table with metrics (Price, 52W Range, Volume, Dividends, Returns, etc.)
- Options in the top-right corner:
- Add asset
- Edit Watchlist
- Export
- ⋮ — More menu
The asset table in the individual watchlist provides the same functionality as the Search Results table. Features such as column header tooltips, sorting, pagination, and other interactions work identically in both tables.
See the Search Results Table Manual for a full overview of available features.
1. Editing Watchlist Details
The watchlist can be edited in two ways:
- By clicking the pencil icon (next to the watchlist name)
- By using the Edit Watchlist button
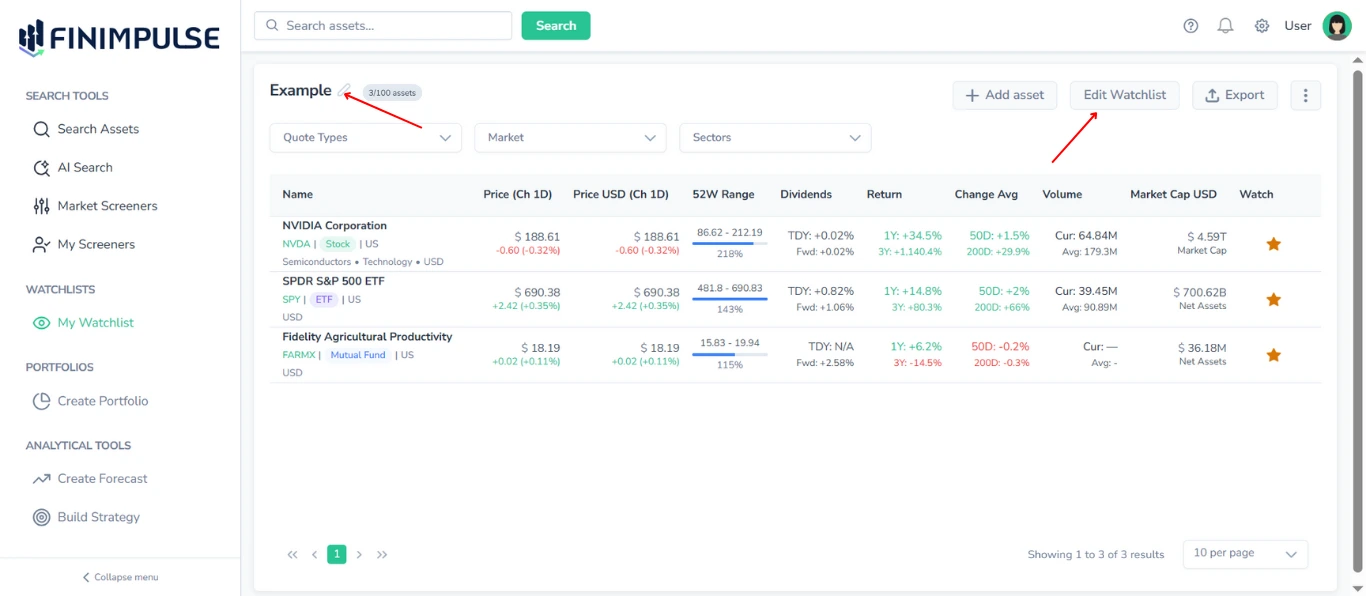
Click the pencil icon/Edit Watchlist button next to the watchlist name → The Edit Watchlist pop-up appears. Here you can change:
- Name
- Description
Click Save to apply changes.
2. Watchlist Assets Counter
The counter (e.g., 3*/100 assets*) is displayed next to the name and the pencil icon.
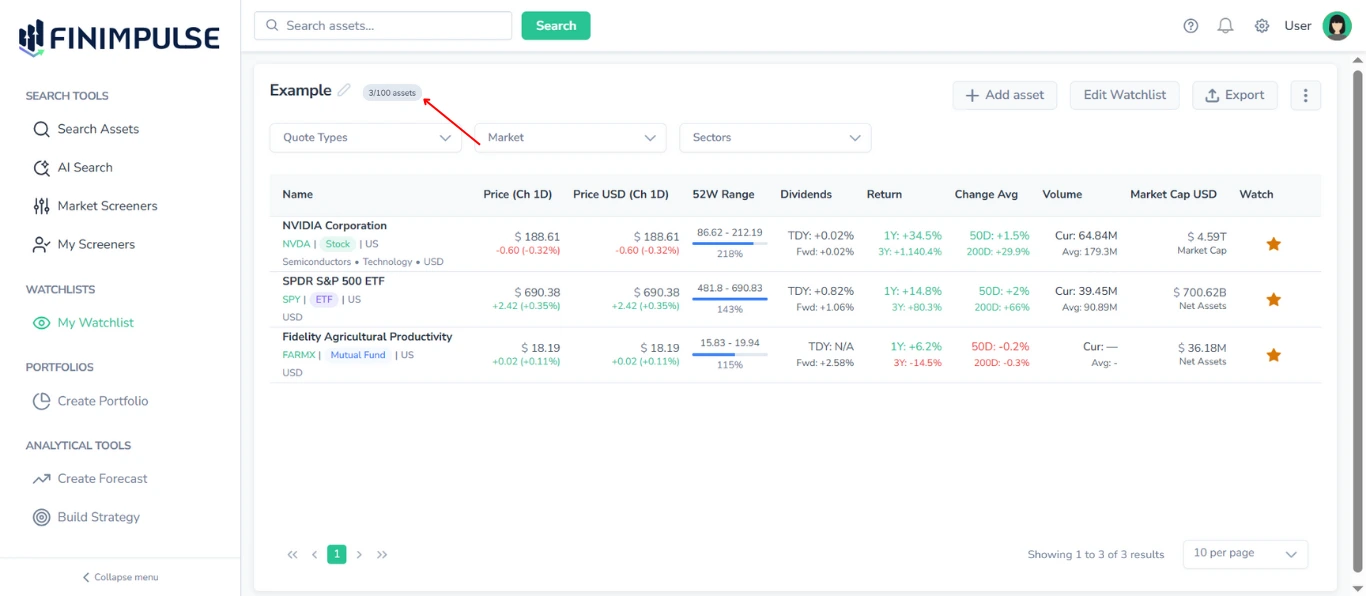
Note: The number of assets each watchlist can contain depends on your subscription plan. For detailed information about plan limits, refer to the Billing page.
3. Adding Assets From Inside a Watchlist
Click Add asset → redirects you to the Search Assets page.
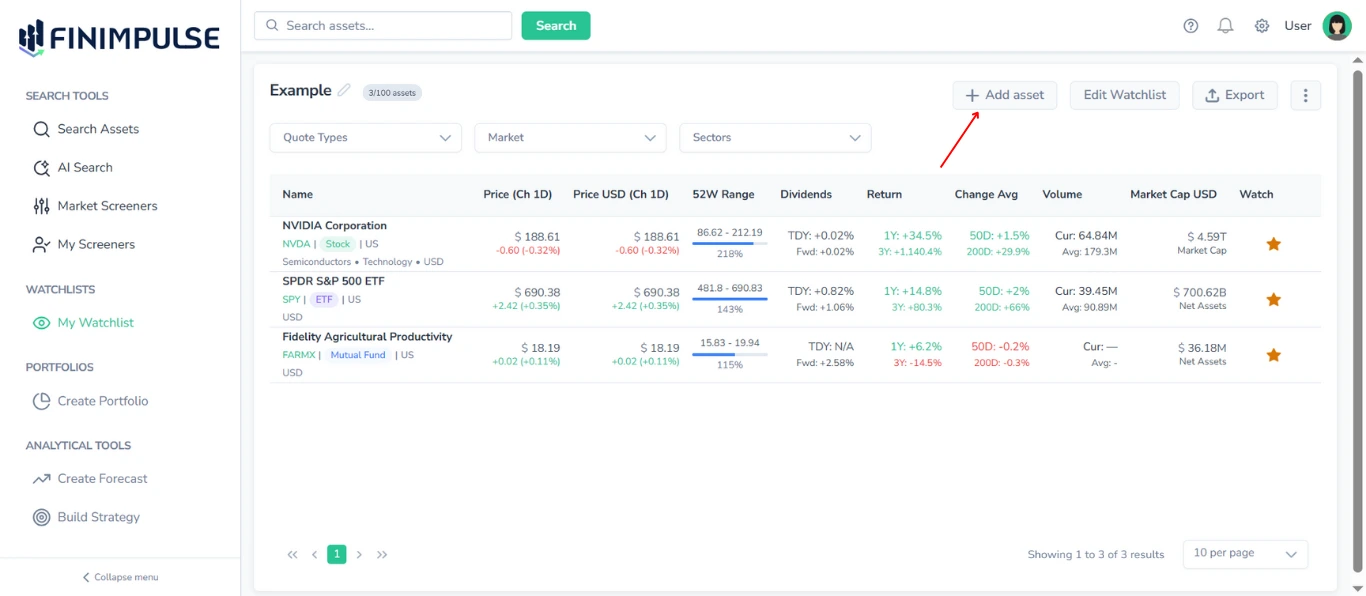
Select any assets and add them to any watchlist using the star icon.
4. Removing Assets From a Watchlist
Click the Star Icon → the Watchlist Selector Pop-Up opens → Untick the watchlist → Confirm.
5. Watchlist Inline Filters
You can filter the assets table inside each watchlist.
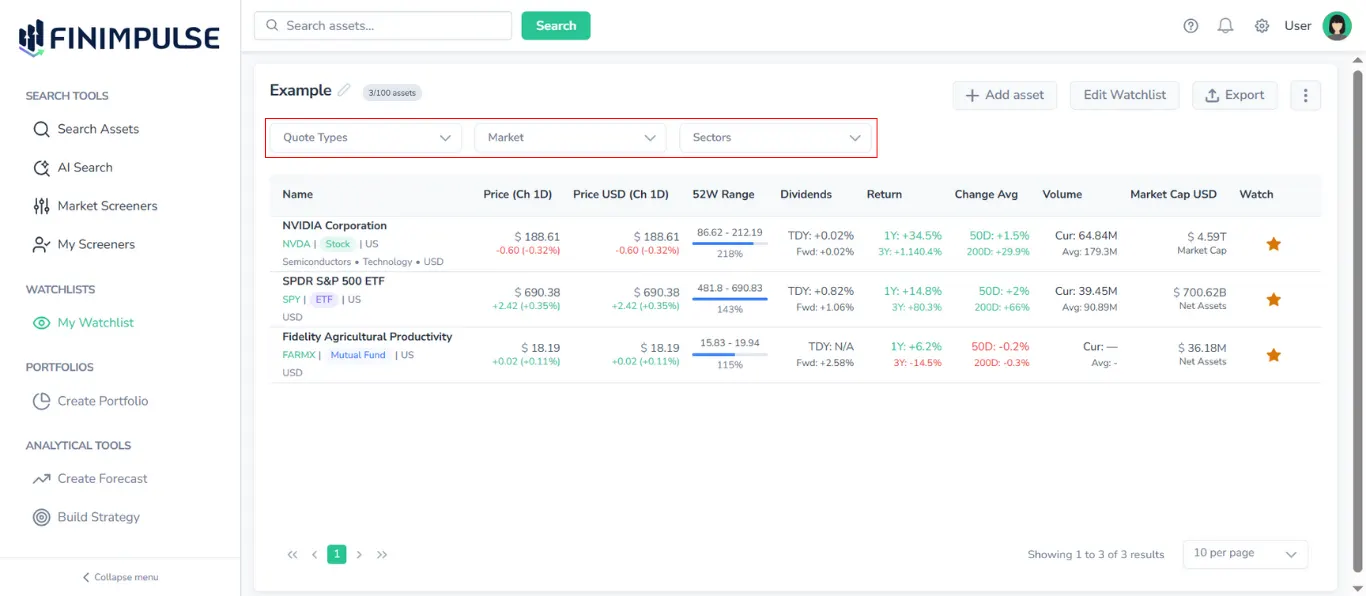
There are three available filters:
- Quote Types
- Market (Exchange)
- Sectors
This allows you to focus on specific segments of your watchlist (example: only ETFs or only US-listed instruments).
6. Sorting Assets in a Watchlist
The table of assets within each watchlist supports the same sorting features as the Search Results table on the Search page.
To learn how sorting works, see the Search Results Table Guide.
7. Column Chooser in Watchlists
Watchlists include a Column Chooser, identical to the one in Search results.
- To open the Column Chooser: Click the more menu icon “⋮” in the top-right corner.
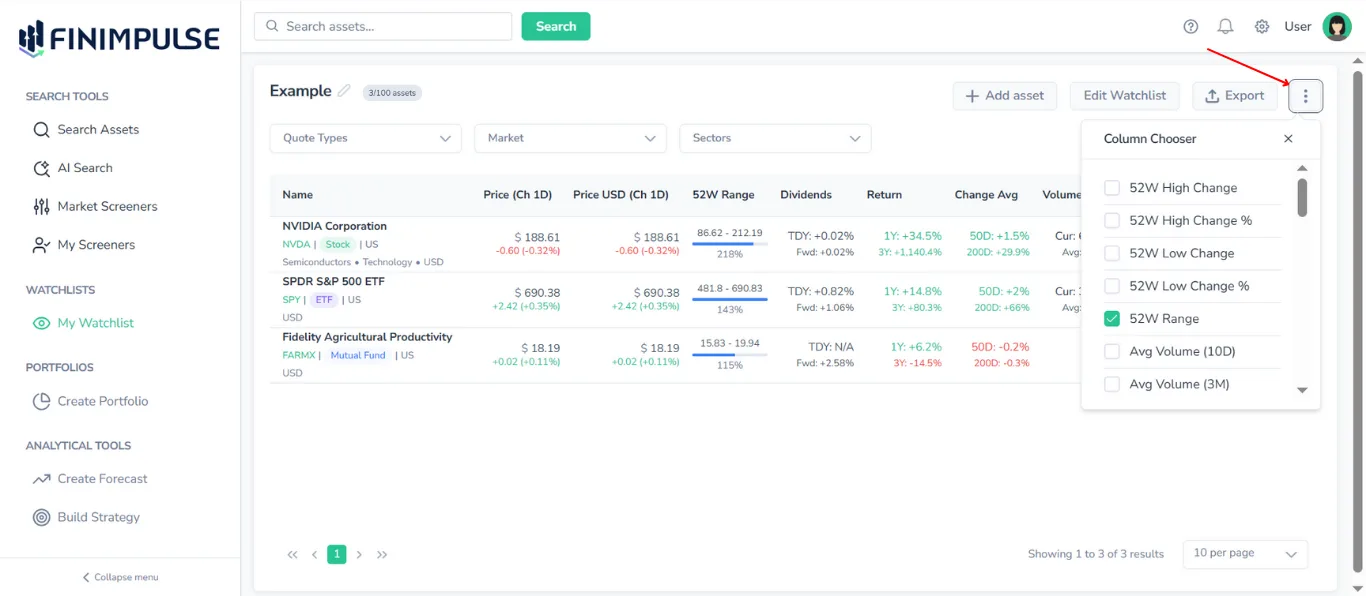
- Enable/disable any column
- The table updates instantly
Column customization is saved for the session.
8. Exporting a Watchlist
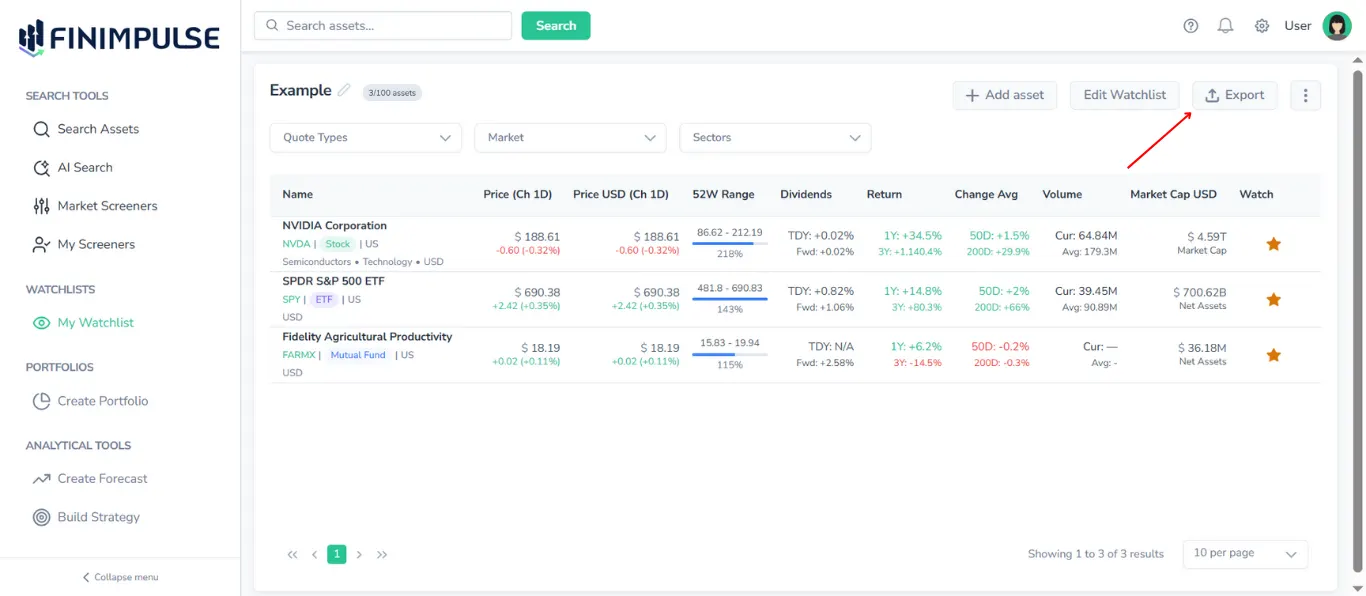
The table of assets within a watchlist can be exported to:
- CSV (.csv)
- JSON (.json)
- Excel (.xlsx)
For more detailed instructions, see the Export Manual.