
Watchlists in FinImpulse allow you to organize and track assets you care about most. Watchlists are available throughout the platform and fully integrated with the Search, Asset Pages, and Screener results.
Each user can:
- Create multiple watchlists
- Add assets from anywhere in the platform
- Edit watchlists
- Delete watchlists
- Customize displayed columns
- Filter assets in the watchlist
- Sort watchlists and assets tables
- Export watchlist data
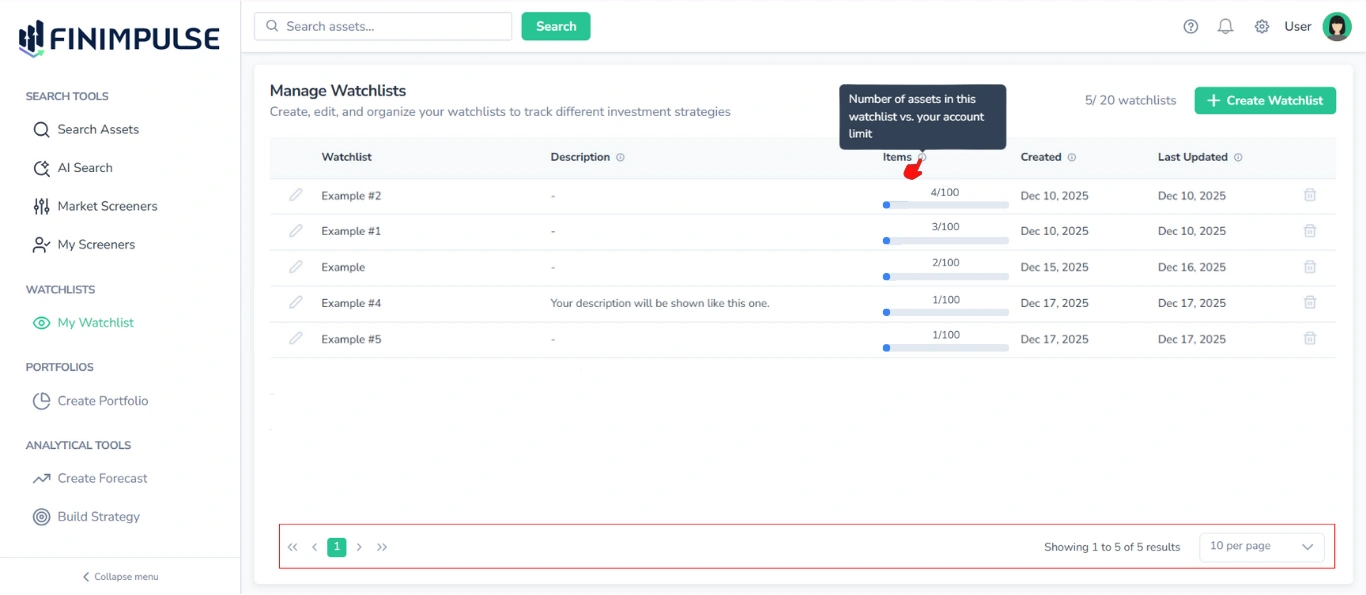
1. Managing Watchlists
The My Watchlist page displays all your watchlists in a table format.

Each row shows:
- Watchlist name
- Description (if any)
- Items count (e.g. 4/100)
- Creation date
- Last updated date
- Delete icon
- Edit icon
You can hover over the information icon (”i” in a circle) next to a table column name to see a description of what that column contains. Additionally, pagination controls are available at the bottom of the page.
From here, you can:
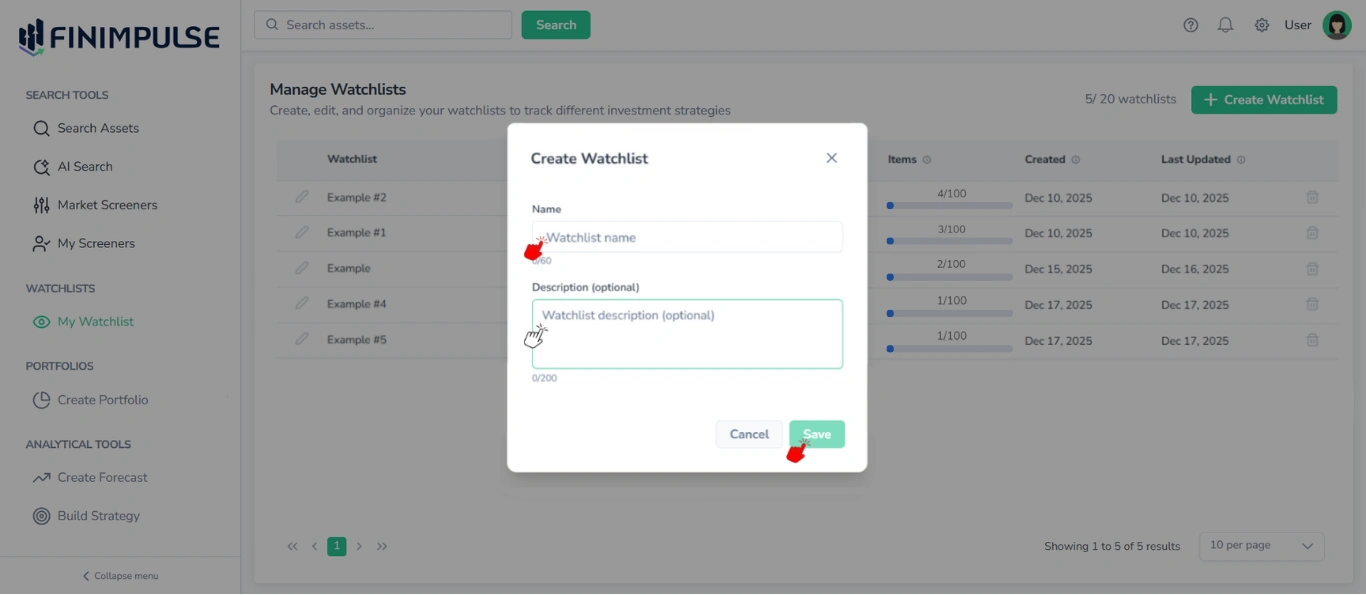
1.1. Create a new watchlist
Click Create Watchlist in the top-right corner→ The “Create Watchlist” pop-up appears→ Enter a name → Optionally add a description → Click Save.
1.2. Edit watchlist details
Click the pencil icon next to the watchlist name → The “Edit Watchlist” pop-up appears (same UI as “Create Watchlist” pop-up). Here you can change:
- Name
- Description
Click Save to apply changes.
Note: These edits do not affect the assets inside the watchlist.
1.3. Delete a watchlist
Click the trash icon.

The warning pop-up appears → Click Delete.
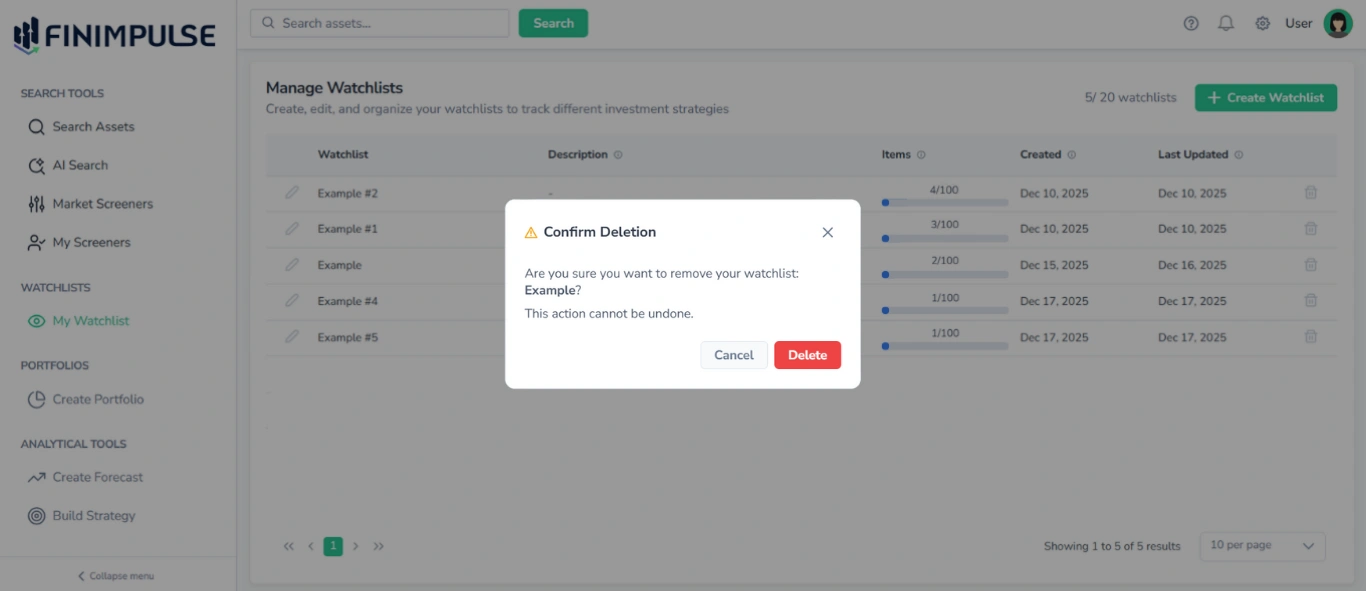
Important: This action cannot be undone.
1.4. See the Watchlists Counter
The counter (e.g., 3/100 watchlists) is displayed at the top right of the My Watchlist page.
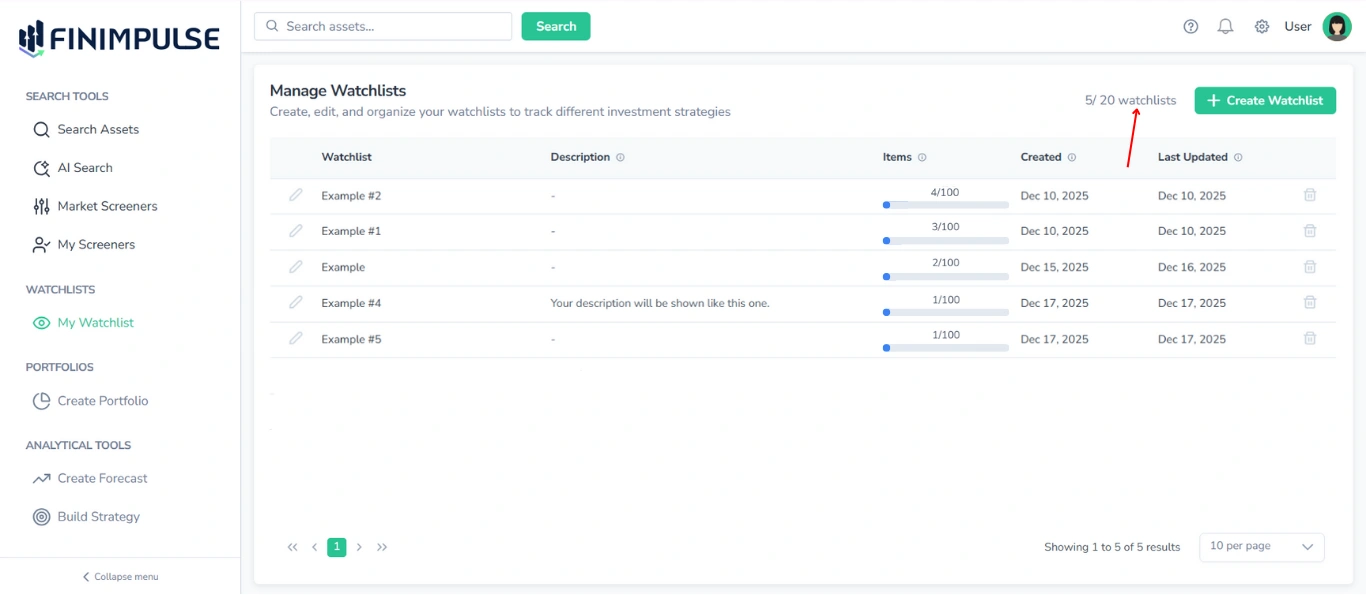
Note: The number of watchlists you can create, as well as the number of assets each watchlist can contain, depends on your subscription plan. For detailed information about plan limits, refer to the Billing page.
1.5. Sort Watchlists
The watchlists’ table supports the same sorting features as the Search Results table on the Search page.
Note: Sorting is not available for the Items column.
To learn how sorting works, refer to the Search Results Table Guide.
2. Adding Assets to a Watchlist
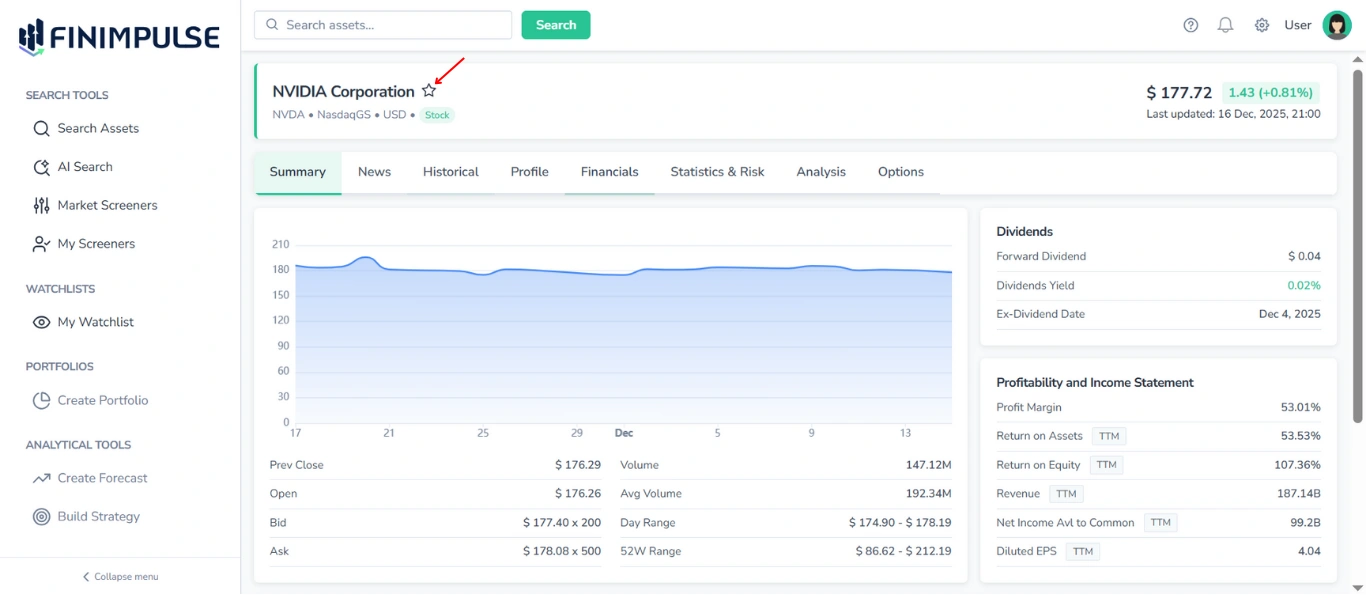
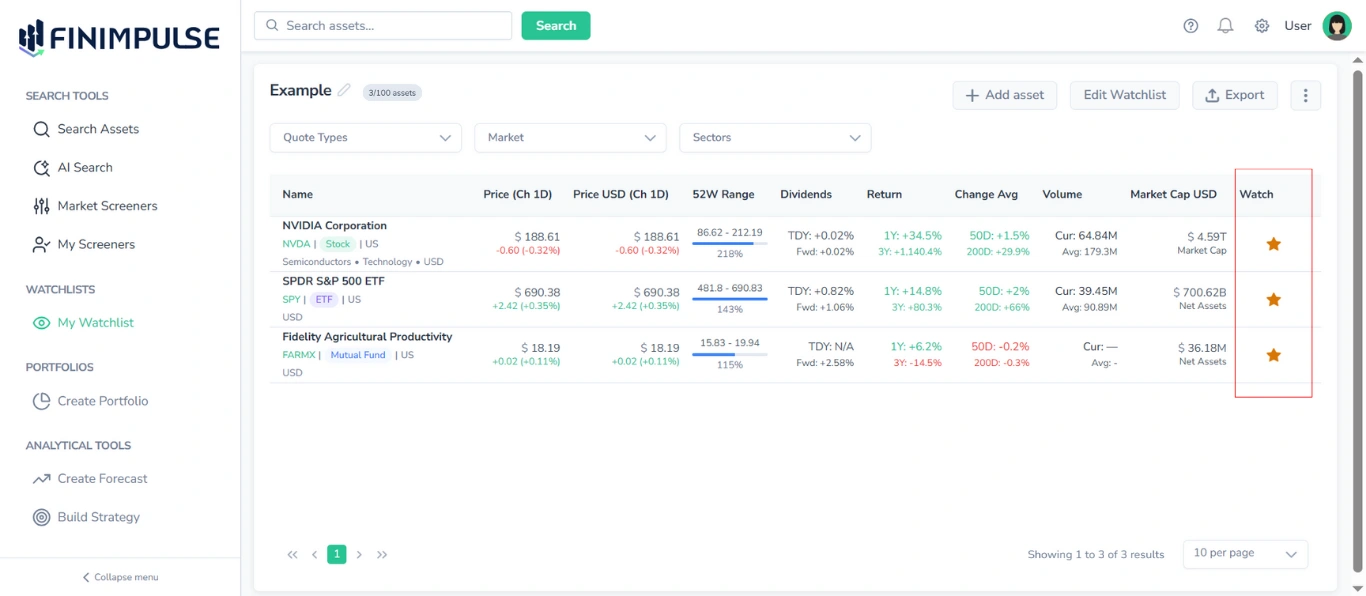
The entire system uses a unified star icon interaction next to every asset. Assets can be added to watchlists from:
- Search results
- Results from Market Screeners & My Screeners

- Asset Pages
- Existing Watchlists
2.1. How to Use the Star Icon
Click on the empty star icon (‘Watch’ column)→ The Watchlist Selector pop-up opens → Add an asset to one/some of your watchlists or create a new one → The Star becomes filled.
![]()
This pop-up allows you to:
- Add an asset to any existing watchlist (or to some watchlists at the same time)
- Remove an asset from any list by unticking the checkbox
- Create a new watchlist directly from the pop-up
Note: You can also click on the filled Star icon and see the same Watchlist Selector pop-up, where you can add an asset to another watchlist, remove an asset from a watchlist, and create a new watchlist and add an asset to it.
2.2. The Watchlist Selector Pop-Up
This dialogue is consistent across the entire platform.
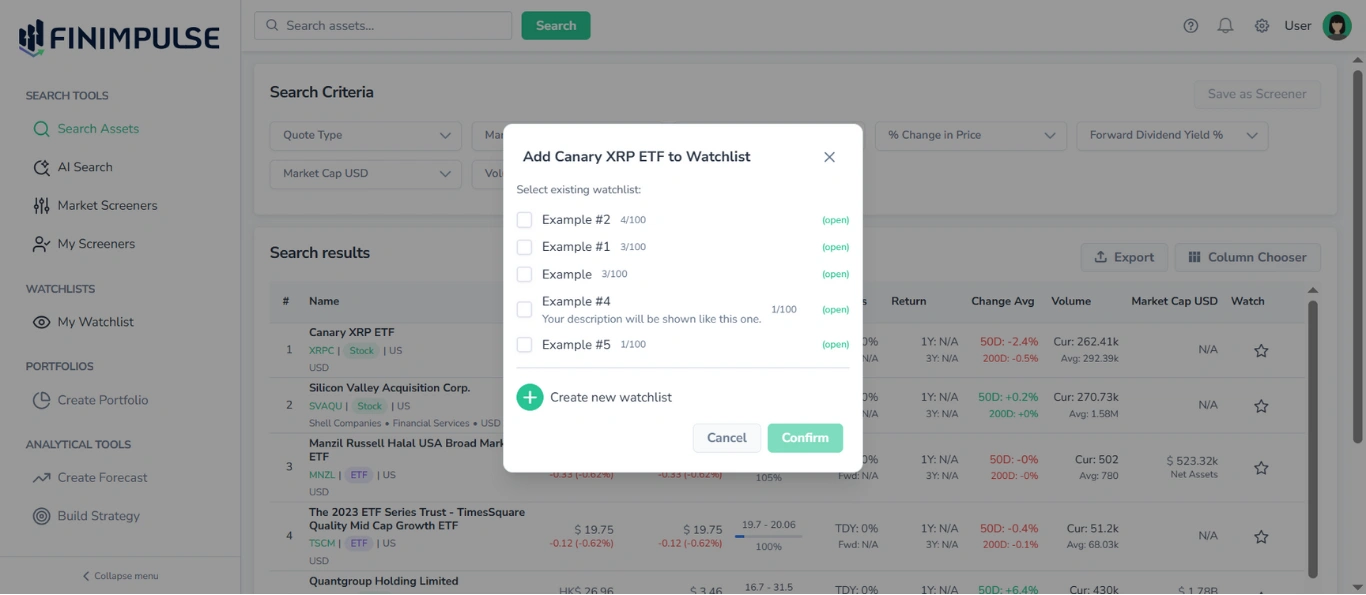
It contains:
- A list of all watchlists
- Checkboxes showing whether the asset is already included
- Item counters (e.g., 1/100)
- A link “(open)” to jump directly to that watchlist
- “Create new watchlist” option
- Confirm/Cancel actions
Key actions:
- To add an asset: Tick any list → Confirm.
- To remove an asset: Untick the list → Confirm.
Note: You can add or remove the same asset from multiple watchlists at once.